Introduction
In this blog post, let’s explore how to add a default block appender to the WordPress block editor. Have you ever wondered how you can make editing more seamless? By using WordPress hooks and the wp.data and wp.blockEditor APIs, we can enhance the way we work with blocks. We’ll discuss how to identify the last block in the editor. Then, we’ll show you how to display a block appender right after it. This simple addition can significantly improve your editing experience. Are you ready to make editing smoother and more intuitive? Let’s dive in.
What is a Block Appender?
In the WordPress Block Editor, the block appender is a handy tool that lets users easily add new blocks. Typically, you’ll find appender buttons within block lists or inside nested blocks. But what if you want to place an appender button in a specific spot, like right at the end of all your blocks? Isn’t it great to have the flexibility to customize your layout just the way you envision it?
Problem
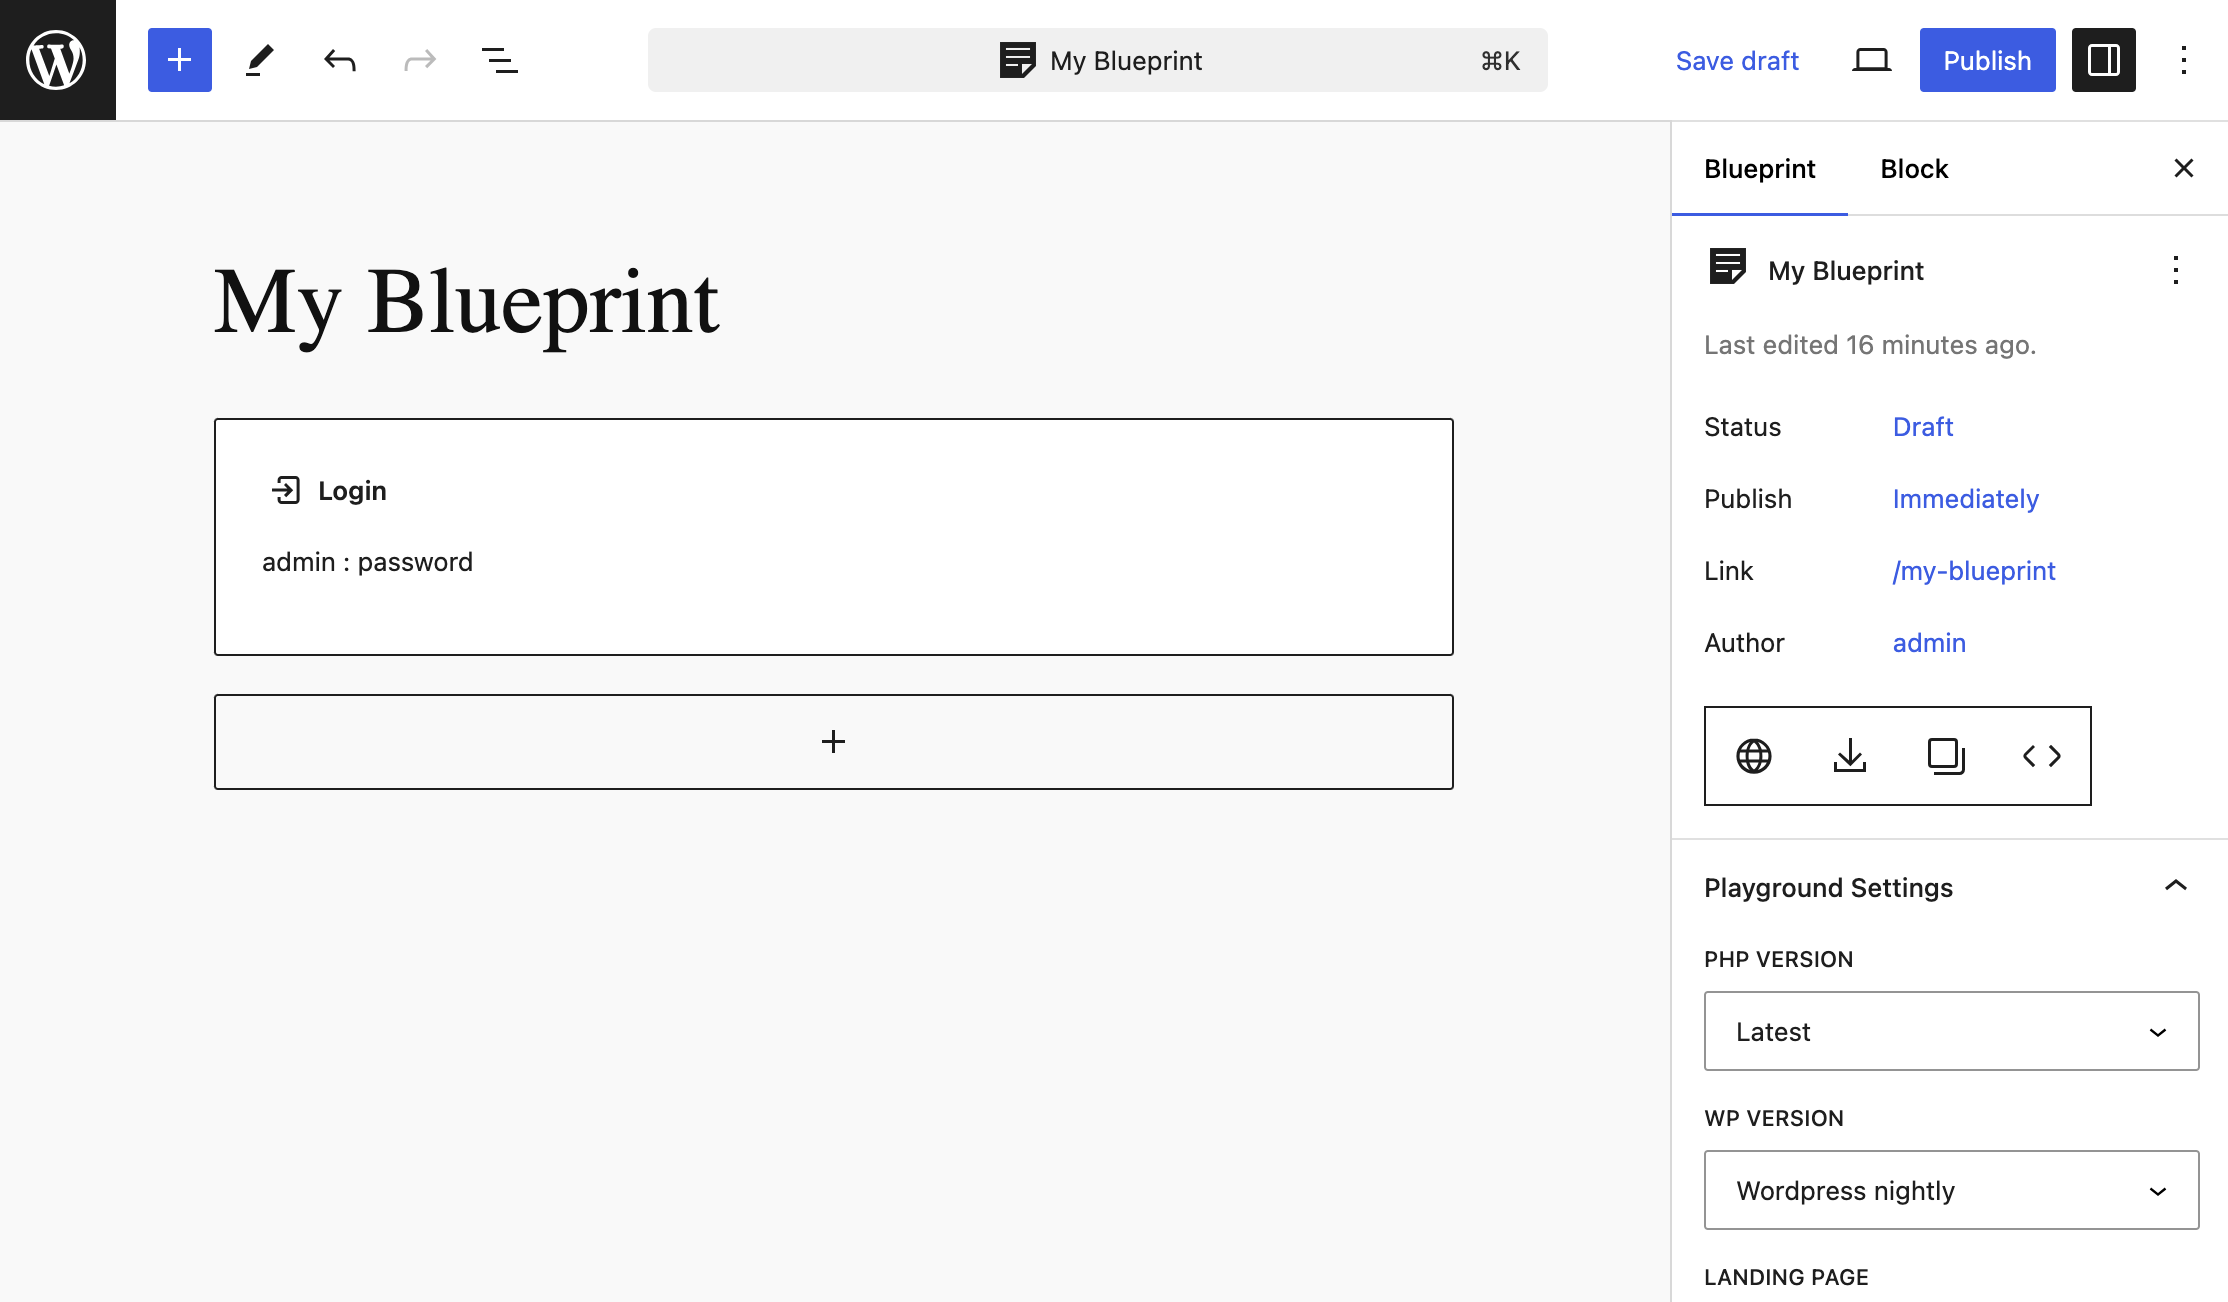
In our journey to create a WordPress Playground Blueprint using blocks, we encountered an interesting challenge. How do we control the display of the block appender? Typically, the Editor defaults to using a paragraph block, enabling users to insert blocks with a slash command or plus icon. But what happens when that default paragraph block isn’t necessary? In our blueprint, it wasn’t needed, and suddenly, we found ourselves unable to add blocks directly within the editor canvas. How can we address this limitation and ensure a seamless editing experience?
Solution
We have created a functionality where the appender button appears after the last block in the editor, allowing users to quickly add a new block at the end without having to scroll back to the “Add Block” toolbar.
Below is the code to achieve this functionality:
const { ButtonBlockAppender } = wp.blockEditor;
const { useSelect } = wp.data;

wp.hooks.addFilter(
    'editor.BlockEdit',
    'block-editor-for-playground-blueprint/default-block-appender',
    (BlockEdit) => (props) => {

        const lastBlockClientId = useSelect((select) => {
            const blockOrder = select('core/block-editor').getBlockOrder();
            return blockOrder[blockOrder.length - 1]; // Get the last block's clientId
        }, []);

        return (
            <>
                <BlockEdit {...props} />
                {props.clientId === lastBlockClientId && (
                    <div className={'block-list-appender wp-block'}>
                        <ButtonBlockAppender
                            rootClientId={null} // Since we don't have nested blocks
                        />
                    </div>
                )}
            </>
        );
    }
);Code language: JavaScript (javascript)
The Code Breakdown
1. Imports from wp.blockEditor and wp.data
const { ButtonBlockAppender } = wp.blockEditor;
const { useSelect } = wp.data;
We are importing ButtonBlockAppender from wp.blockEditor, which is the default button used for adding new blocks. The useSelect hook from wp.data allows us to retrieve data from the block editor’s data store.
2. Adding a Filter with wp.hooks.addFilter
wp.hooks.addFilter(
    'editor.BlockEdit',
    'block-editor/default-block-appender',
    (BlockEdit) => (props) => {
        ...
    }
);Code language: JavaScript (javascript)
Here, we’re using wp.hooks.addFilter to apply a filter to the editor.BlockEdit hook. This hook lets us modify the behavior of block rendering during the editing process. The function inside this filter adds our custom behavior for the last block.
3. Getting the Last Block’s clientId
const lastBlockClientId = useSelect((select) => {
    const blockOrder = select('core/block-editor').getBlockOrder();
    return blockOrder[blockOrder.length - 1]; // Get the last block's clientId
}, []);Code language: JavaScript (javascript)
Using useSelect, we access the current block order from the core/block-editor data store. getBlockOrder() returns an array of block IDs in the current editor session. We then retrieve clientId of the last block.
4. Adding the ButtonBlockAppender Conditionally
{props.clientId === lastBlockClientId && (
    <div className={'block-list-appender wp-block'}>
        <ButtonBlockAppender
            rootClientId={null} // Since we don't have nested blocks
        />
    </div>
)}Code language: HTML, XML (xml)
We use a conditional statement to check if the clientId of the block being edited is the same as the last block’s clientId. If true, we render the ButtonBlockAppender component right after the last block.
5. Returning JSX with the Block Appender
return (
    <>
        <BlockEdit {...props} />
        {props.clientId === lastBlockClientId && (
            <div className={'block-list-appender wp-block'}>
                <ButtonBlockAppender
                    rootClientId={null} // Since we don't have nested blocks
                />
            </div>
        )}
    </>
);Code language: JavaScript (javascript)
We return the modified BlockEdit component. Inside, we conditionally render the block appender for the last block using JSX.
In conclusion, this blog demonstrates how to add a block appender after the last block in the Gutenberg editor using WordPress hooks and APIs. By customizing or replacing the appender, developers can enhance the block editing workflow, showcasing the flexibility and power of WordPress for creating tailored content experiences.
👋 Need help building block-based solutions catering to your needs? Let’s talk.
Related Post
The Developer’s Bank: A Beginner’s Guide to GitHub Through Financial Analogies

LUBUS Highlights February 2025
Rolling Names: Migration from Visual Composer to WordPress Block Editor
